The Micro 2 comes in two versions:
Background
I somehow always had a personal fascination for the Micro 2. Not much information was available about this little devices besides scarce details in forums and a Youtube video or two. At one time I even believed they were not real due to the many 3D renders of the device without some actual footage. Well…***spoiler alert*** they are alive and kicking and I’m happy ThermalBase got a chance to put them to the test while sharing our thoughts with you.
What's in the box?
The Micro 2 is packaged in a pelican case and comes with a CR123A battery, Micro USB cable and a quick-start guide to get you started straight away. You could literally be up and running in less than a minute.
Immediately after opening the box I’m thinking ‘wow, this is one sexy device'. I knew it would be small, but it’s often hard to tell from pictures alone.
All sentiment aside, let’s dig a little deeper and see what we can find out about this device.
Aesthetics
Targeted at the professional/military user IR&D opted for a black, industrial looking body made from an aluminum/magnesium alloy. Somehow it has a high spy-factor, but I’m sure nobody would mind about that. However, if you do, there’s a gold-painted version available which ups the bling factor. Not my thing but hey, it’s there if you need it.
Ergonomics
No, it doesn’t have any rubber anti-slip or carved-in finger placement slots but it doesn’t need them really. It’s so small and light that there are plenty of ways to hold this device comfortably using just one hand. The ideal grip for me is to place my thumb on the bottom and my index- and middle finger on top. You can even hold it between two fingers if you want to look fancy. The only time you really need to use two hands is when you want to adjust the focus ring or want to close the lens cap. For added safety there’s a small hinge to attach a carrying cord which wraps around your wrist or neck.
Durability
This device can take some beating and you shouldn’t worry too much if you drop it by accident. Its mil-spec build and a rating of IP66 keeps it protected from dust and excessive water, although it’s not rated as submersible.
Optics
The Micro 2 spots a 35mm F/1.5 lens which is well protected by its metal flip-open cover. To open the lens cap you can slide a small hinge which opens the cap automatically using a small spring. To close it you have to push it back and slide-lock it again.
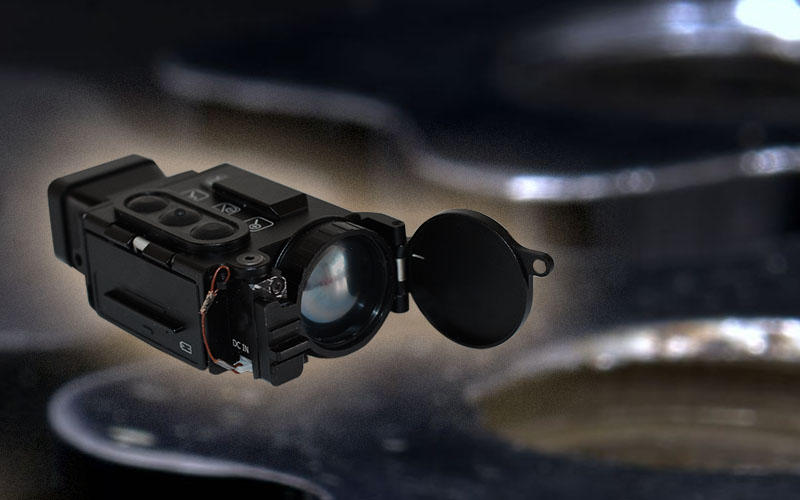 Front view of the Micro 2
 The focus can be adjusted by turning the focus ring in either direction. While it turns smooth you need to apply some pressure to turn it. You can be sure that once the focus is set you don’t have to worry about moving it by accident. The minimal focus distance is about 2 meters for this particular version and the field of view is 8.9 by 6.7 degrees which makes it suitable for long range surveillance, less for filming your dog taking his nap in your favorite chair.
Display
The Micro 2 has an 800 x 600 pixels OLED display which offers good clarity and sharpness. It doesn’t have a rubber eye-cup like you’re used to; instead it’s a rectangular viewfinder made from enforced plastic. For us the ideal viewing position is to place it just far enough so that your eye (lashes) don’t touch the viewfinder’s spherical lens.
Button layout
The Micro2 has a simple button layout with only 3 buttons:
- Zoom in / Navigate down
- Power / Menu / Ok
- Zoom out / Navigate up
Scroll down for a break down of the menu options.
 The Micro 2's 3-button layout. A nice detail, the middle button has a different texture
Optical sensors
The Micro 2 has a proximity sensor to turn the display off when you’re not looking and a light sensor to adjust your display brightness automatically.
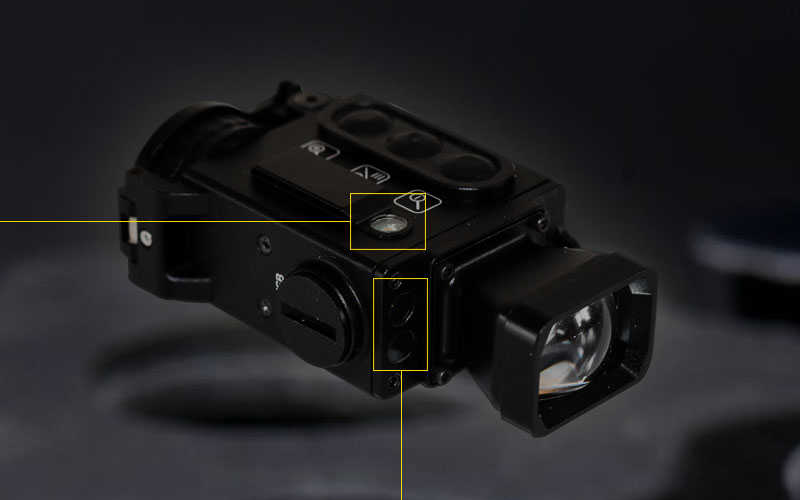 Light and proximity sensors
Other sensors
An accelerometer, gyro and magnetic sensor are built-in for pitch, roll and a digital compass which are visible at all times when the screen is on. It’s advised to calibrate the sensors on a regular base but during our tests spanned over 1.5 weeks we only had to calibrate them once.
Connections
A Micro-USB port is found on the left side of the device by turning the screw CCW. We’ve been told an image capture function will be available soon, which is great plus. This will be added to the Micro 2 via a firmware upgrade. At the time of writing however we still had to record photos and videos the old fashioned way so excuse us for bad quality at times.
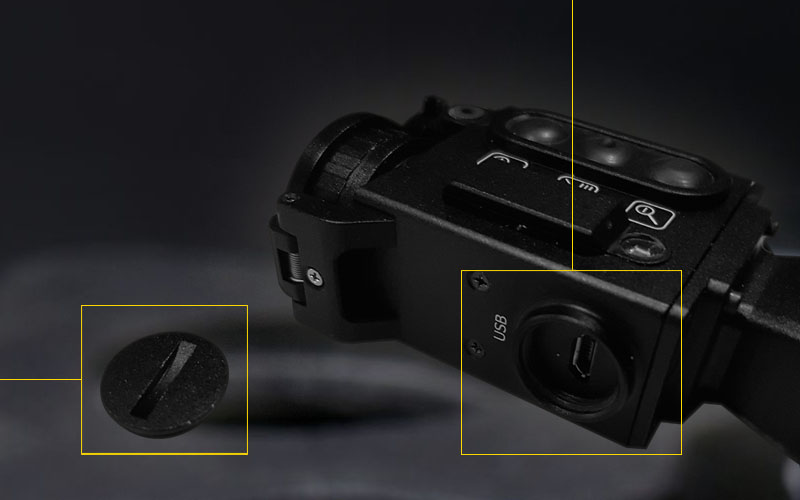 The USB port is well protected from dust and water
Battery slot
The battery slot is conveniently located at the right side of the device. It accepts CR123A batteries as well as rechargeable 16340 batteries. If you need continuous power you can connect an external battery pack or wired cable via the DC-In slot located on the bottom of the device, next to the lens.
Software walkthrough
The default viewport shows the following information:
- Zoom factor (graphical and numerical)
- Tilt/roll information (graphical and numerical)
- Battery information
- Azimuth and direction
IR&D managed to keep its menu simple and straightforward. It’s accessed by long-pressing the menu button.
Profiles
Up to 5 profiles can be used to store your favorite settings. The default profiles contain for example a black hot, white hot, as well as a high contrast detection profile.
Display settings
Brightness and contrast of the internal display can be controlled here. You can also enable auto-brightness which controls the display’s brightness based on the available light outside. A video-out option is available as well, we will update our recorded movies once we get our hands on it.
Sensor settings
- DDE
- Palette
- WhiteHot
- BlackHot
- Fusion
- Rainbow
- Glow
- Iron 1
- Iron 2
- Sepia
- Color 1
- Color 2
- IceFire
- Rain
- RedHot
- Isotherm
- Contrast
- Brightness bias
- ITT MP
- Max Gain
- NVFFC (Flat Field Correction sensor calibration)
- Factory reset
Eye sensor
- Enable (on/off)
- Setup
- Calibrate
Orientation
- Auto rotate (on/off)
- Pitch (on/off)
- Roll (on/off)
- Heading (on/off)
- Calibrate
Auto off
By short-pressing the menu button you can quickly change the selected profile and update their properties as well.
Calibrating the sensor
Thermal imagers need frequent calibration to make sure all pixels behave the same and create a smooth and reliable image. The Micro 2 is no exception here. The process is quite easy though; just close the lens cap (you don’t need to lock it) and it will calibrate by itself. The process takes a second or two. During our viewing sessions we didn’t find it necessary to recalibrate it again, but your mileage may vary depending on weather conditions and change of environments.
 My test-dummy kids :) Indoors, about 5 meters away
Performance
In the field
The first day we tried the Micro 2 was rough for any thermal camera. -1ºC (30 ºF). In urban areas it performed really well due to the high diversity in thermal radiation. Out in the open field however it struggled to get a good contrast by default since the temperature differences were very small between the various vegetation. We did manage to increase the contrast a fair bit by playing around with settings such as DDE and changing the gain value. That being said, we could easily identify a person at about 300 meters so we don’t necessary see this as a bad thing.
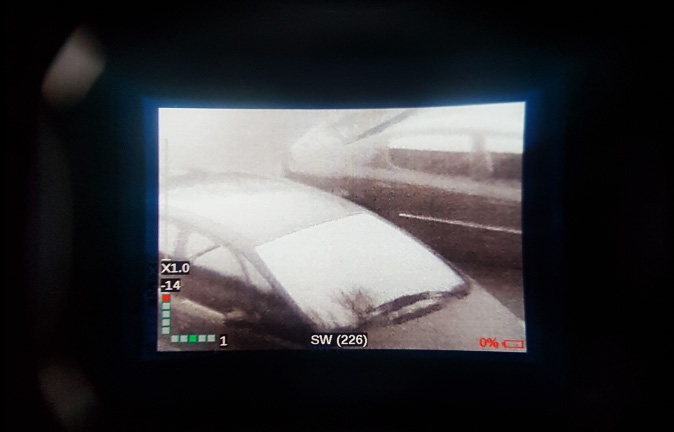
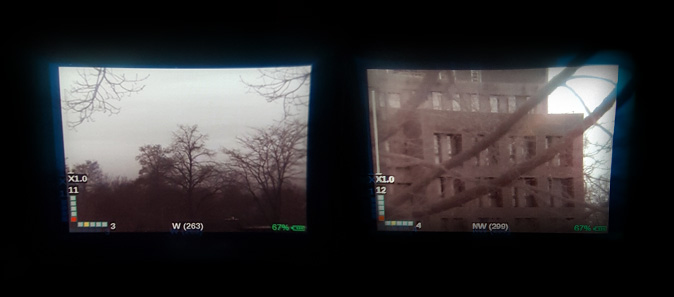 The Micro 2 can deliver some crisp images. Please note these are recorded through the viewfinder.
 The second day we went to the same fields again, this time with a nice pre-spring sun, objects had some time to absorb the heat and this made all the difference. Lots of details to be found now and a good contrast between rocks, plants, bushes and other vegetation. Rabbits and birds were easily spotted around us. No deer or other larger animals unfortunately for the simple reason that they’re not that common here and we just need to get lucky.
During the night the contrast was still great, however a little less then daytime. The cool thing about this thing is that you just walk around, take the Micro 2 out of your pocket and start observing quickly. No hassles with carrying pouches, backpacks or getting rid of lens caps. It makes you feel like you’re in control of your surroundings and can respond to events virtually immediately.
 Sunset dreams
 As said before, you need to apply some pressure to the focus ring to get it moving, but it does focus really well and outputs some crisp images to the display. You sometimes want to zoom-in a little to get the focus just right before zooming-out again.
We had some fun with the camera indoors as well, but the Micro 2 is really made for outdoors due to its larger focus distance and slightly narrow field of view. This thing is made for the outdoor professional.
 Running out of juice
9Hz, with a twist
Yes, many US-manufactured sensors still come with frame rate restrictions, we have to accept that and wait for better days to come. The Micro 2 is utilizing a FLIR Quark core and here in Europe (without the proper license) you’ll get the 9Hz version. This time however it doesn’t feel 9Hz at all. IR&D has put a lot of effort in optimizing the display algorithms bringing you a perceived ~15Hz, yes that’s far from 50/60Hz but it really does make a difference.
Battery life
We managed to get a good 3+ hours on a single CR123A battery without using the auto-shutdown, auto-brightness or proximity sensors to their full extend. With these activated we got about 3.5 hours. Now if you’re frequently outdoors or need to use the Micro 2 throughout the day you better invest in a batch of CR123A batteries, better yet…get a couple of 16430 rechargeable ones. The initial investment is higher obviously, but it’s definitely worth it in the long run.
As said earlier, when you do need continuous power for a long period of time you can attach an external battery pack to the DC-in power slot.
Head mountable
The Micro 2 can be easily head-mounted using the special ridge on top of the device. With its weight of just 120g you don’t have to worry about adding a counter-balance or straining your neck too much. Giving the FOV you most likely won’t navigate with it but it’s perfect for flip down – scan – walk scenarios.
Please leave a comment below or contact us if you have any questions about this device. More information about this device and other IR&D devices can be found here.